As I mentioned last time, I have been (very slowly!) making a lower class woman's outfit for the Manuscript Challenge. My inspiration image is from one of the many Roman de la Rose manuscripts and the veil of it is this:
 |
Felonie, Roman de la Rose.
UC MS 1380, f. 2r.
c. 1365, France. Source. |
This image isn't the best quality, but comparison with other images of lower class women from the 13th through until the 15th Centuries shows this distinctive veil with a band around the head and, often, a knot at one temple. But, how to make it...?
First I researched others' interpretations - after all, why fly blind when you don't have to? Whilst others' interpretations are never a replacement for original images, they often give useful information, particularly about construction.
I... found very, very little. In total, three interpretations:
- The Foracheim 1248 reenactment group website has a woman wearing this style of veil in one small image at the bottom of their tablet weaving page (a bigger version of the image is available here).
- Gabriele Klostermann from the Tempora Nostra reenactment group wrote two tutorials for this style of veil, including dimensions and folding instructions. The first version uses a rectangular veil 180 cm x 40 cm. The second version uses a tapered veil which is c. 170 cm long and 42 cm wide but after 63 cm starts to taper, ending up about 7 cm wide.
- Gerda from Die Handmaid made this style of veil following the second tutorial at Tempora Nostra's website and wrote about it here. She followed the dimensions in the original tutorial.
I started off with the Tempora Nostra tutorial 1 but altered a few bits, in particular to get the characteristic temple knot.
My veil is approximately 19" x 94" with a tiny 1/8" rolled hem (mostly just because I wanted practice doing one). That works out at 48 cm x 238 cm. A veil of this length sounds absurdly long. However, you need all that length (although perhaps not quite that much width) to adequately cover the neck. (One thing that I was determined to solve with this interpretation was the lack of neck coverage - it is this feature that makes all the interpretations I found not look like the manuscript images.) Also, a veil of this length is supported by this manuscript image, which (I think) shows this veil style unraveled:
 |
| Portrait of Felonie, Roman de la Rose. BNF Fr. 805, f. 2r. 15th C, France. Source. |
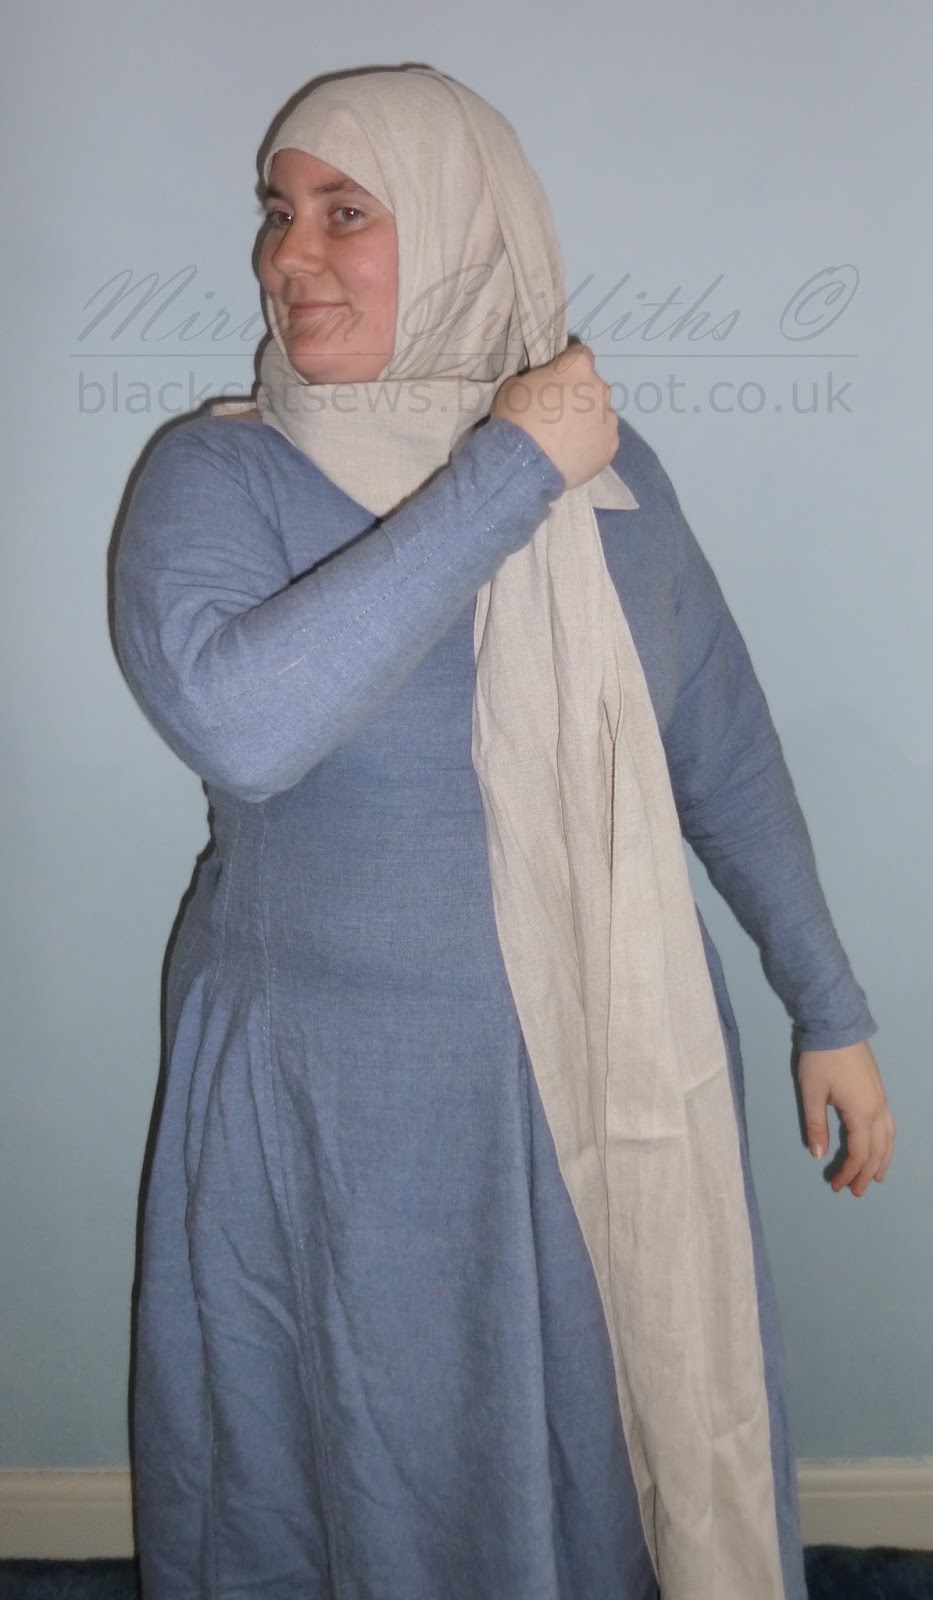
Anyway, seeing as (sorry guys) I don't like to put images of my face on the blog, my lovely friend posed whilst I instructed her in how to use the veil. This is her first time wearing it!

1) Take the veil and lay it over your head so that the front edge goes as far down your forehead as you wish the finished veil to go. She & I are right-handed, so we put our shorter length on the right side. I now actually tend to put a bit more length on the short side than in this photo - maybe down til natural waist - as it helps with neck coverage later.

2) Pinch a fold at the left and right temples.

3) Take those pinched bits of fabric and fold them down towards your face, keeping the fabric taut. This is the fold that will keep the fabric laying neat and tidy against your face and forehead. It also helps keep the whole contraption secure.

4) Keeping the fabric taut and the folds in place, draw the long length of fabric under your chin and to the opposite temple. If you don't like a very tight wimple section, this is the point at which to open your mouth, to give yourself that little bit of extra room.

5) You should now have the front of your neck nicely covered. Whilst continuing to hold the end tight at your right temple (keeping the under-chin section taut and holding the right-hand temple fold in place with your hand), you can now adjust the coverage of your neck a little.

6) Bring the long length over the top of your head, so that the front edge of it runs in a neat line from the point of your chin, up over the fold at the temple (keeping in it place), up over the crown of your head and back down to the temple on the other side. Remember to keep everything taut!
7) Loosely pleat or gather the remaining long length, roughly at the height of your left ear lobe.

8) Begin to twist what will become the band around the head. Twist it towards your body.
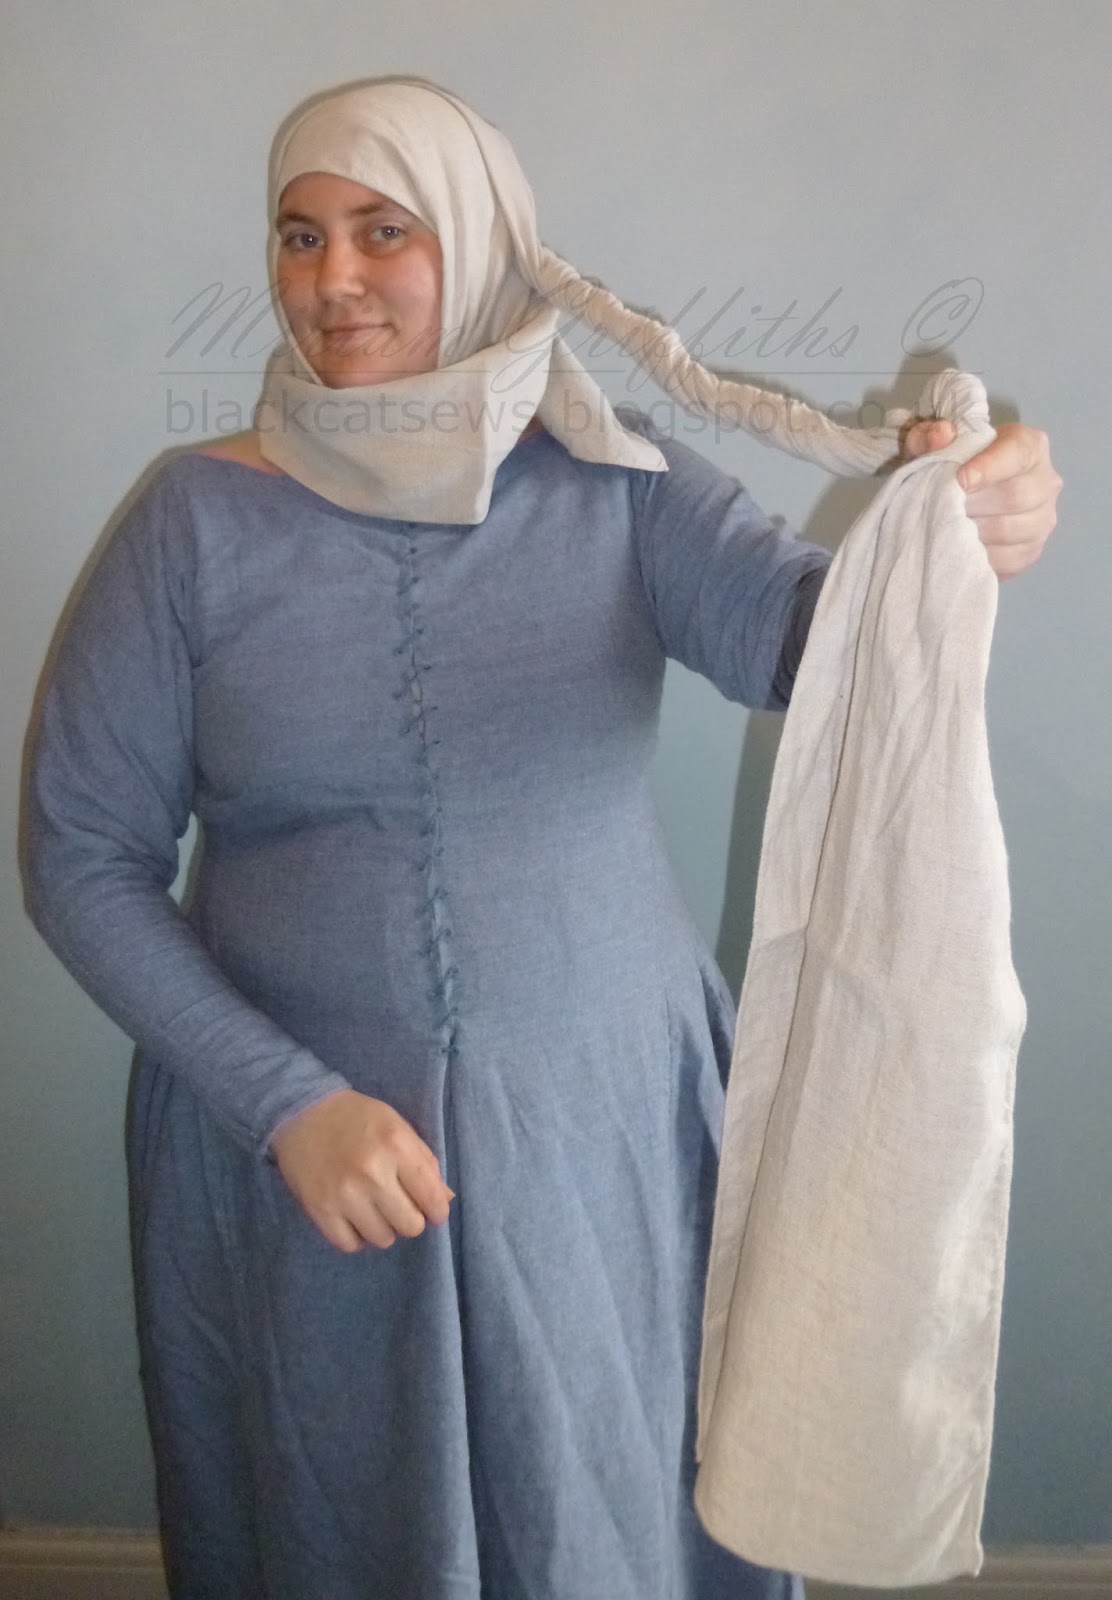
9) Continue to twist until you have an arm's length. This works best if you hold the fabric in-line with your left eye whilst you do this, to ensure that the twist does not end up going too far around the back of your head and thus affecting coverage of the back of the neck.

10) Place the twist over your forehead. And keep twisting!

11) Place the twisted roll around the back of your head, making a loop that sits an inch or so above ear-height. You may need to use your other hand to make sure the loop does not slip out of place at the front of your head whilst you do this step.

12) Huzzah! We've got all the way around the head. Almost finished...!

13) Put a thumb or finger under the twisted loop at the left temple.

14) Push a small bit of twisted material up under the loop, using your thumb/finger as a guide.

15) Flip the small bit of twisted material so that the loose end is on the back side, overlying the twist. This bit is super-important - its moves the loose end from this 'knot' further back so that it doesn't flap in your face all the time.

16) Gently tug on the the front wimple region until it covers your neck.

17) Take the other narrow end of the veil (it should be hanging in front of your right shoulder) and toss it behind you. This is the section that covers the back of the neck. If you followed my suggestion at the beginning and made it longer, it should be long enough to bring in front of the left shoulder, thus also covering the small triangular-shaped gap you otherwise get on the left side of your neck.
18) Tuck any of the wimple bits you feel like into your dress neckline. This will make them behave much better and give you the clean shape to the bottom of the wimple section that you see in some of the manuscript images.
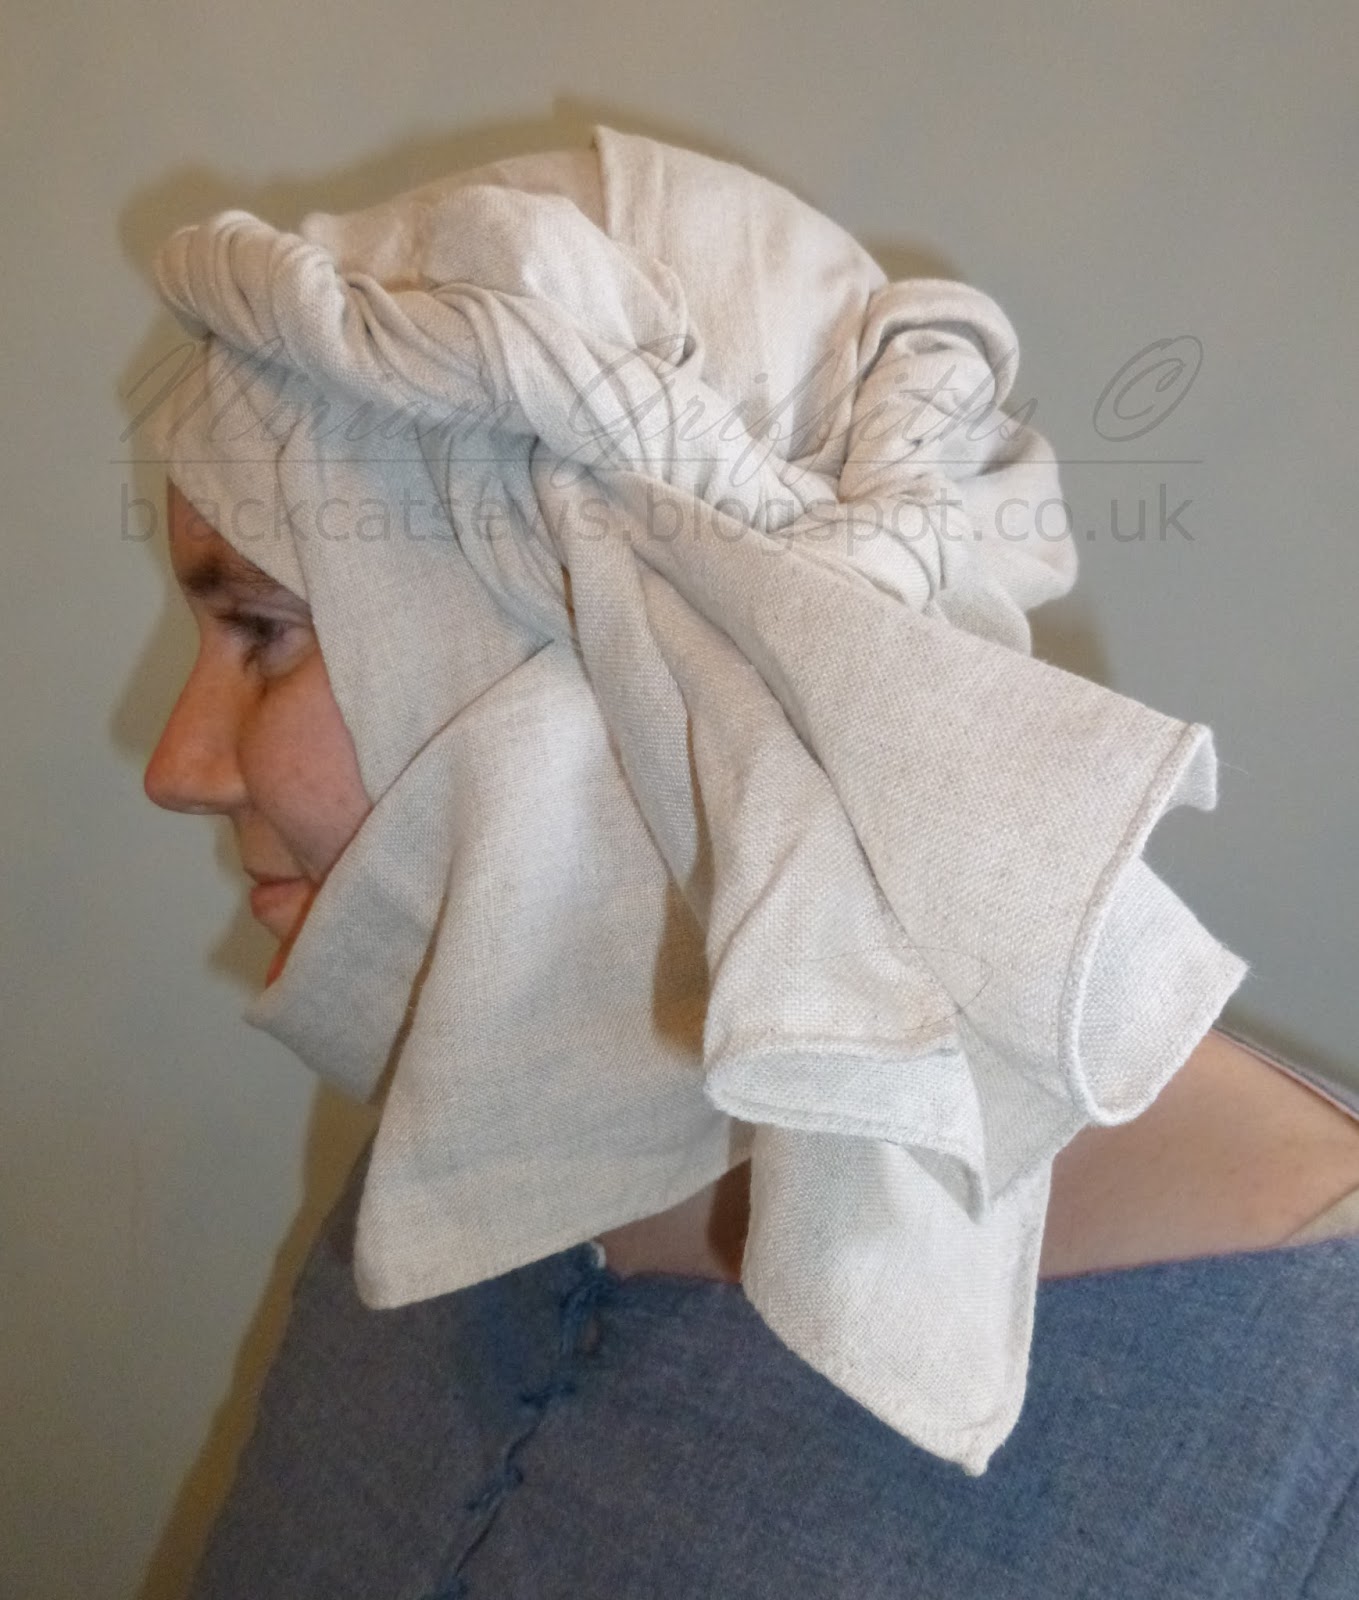
Et voila! Front and left (knot) side view. (You can get better neck coverage than this - blame a combination of an inexperienced user and a very wide dress neckline.)

My thoughts:
In terms of sewing, it was an absolute pain to do all of those hems (uuuuuurgh!). I suspect that medieval women would have made this out of a narrow fabric so that only the two short hems would need sewing - the long edges would be selvage.
This veil style is very comfortable and surprisingly easy to get the hang of - no bigger learning curve than say a Birgitta's coif or fillet with a pinned veil and wimple. My linen is, perhaps, a touch stiff for this style - a softer fabric would drape better and have a knot tail that stuck out less. I also suspect that it may be able to be tweaked so that the twisted loop that goes around the head could provide padding and stabilisation for carrying baskets, etc. on the head (which you see lower class women doing in manuscript illustrations). However, I've only done a limited amount of experimentation with that.
My only big complaint with it from a reenacting standpoint is that it doesn't play nicely with a hood, due to the knot, so it's not great for wet weather. I wonder if, maybe, this style was at least sometimes made from wool. However, you can wear this veil as a simple wrapped veil/wimple without the knot (rather like a hijab), which is another fairly common headdress style for this class of woman. This veil is longer than it needs be for that, but in a pinch it'll work and then you can get a hood on, too.
The public love it - they seem to think the knot and the twisted band quite attractive, as veiling goes. I've also ended up on many occasions showing members of public how it wraps. Once you're practiced, it goes on very quick and looks quite impressive!
However, the best thing about this veil is its history - I like wearing a style that would have worn by the common masses which, after all, I'd have been far likely to be a member of if I'd lived back in the 14th Century. I particularly like this because so few people seem to reenact the really low end of the social spectrum. It's nice to be able to redress that balance a bit.
I'm definitely going for low end noble or merchant class. I can't afford high end! Not & do it right!
ReplyDeleteI'm also really fortunate if I get to reenact, at all. But I love the period & the kirtles.
Ah, for lower nobility or merchant, this style wouldn't be appropriate. I can point you towards a whole set of veil tutorials done by my group, though, many of which would be appropriate for you.
Deletehttps://cardiffcastlegarrison.wordpress.com/2014/08/11/how-to-wear-fourteenth-century-veils-and-wimples/
Thank you! I'll save it for low class... free yeoman? Jennifer.
ReplyDeleteAnyway, I'm sure the site shows all the answers! Jennifer
This one is pretty much confined to people the illustrator wanted to portray as really poor, e.g. farm laborers. The other styles, e.g. wrapped with no knot, wimple-and-veil, that are portrayed on my group's blog are good for middling sorts.
DeleteThis comment has been removed by a blog administrator.
ReplyDeleteThank you.
ReplyDelete